RAM mount kit - a bit pants?

Lutin

Administrator
Staff member
Forum Supporter
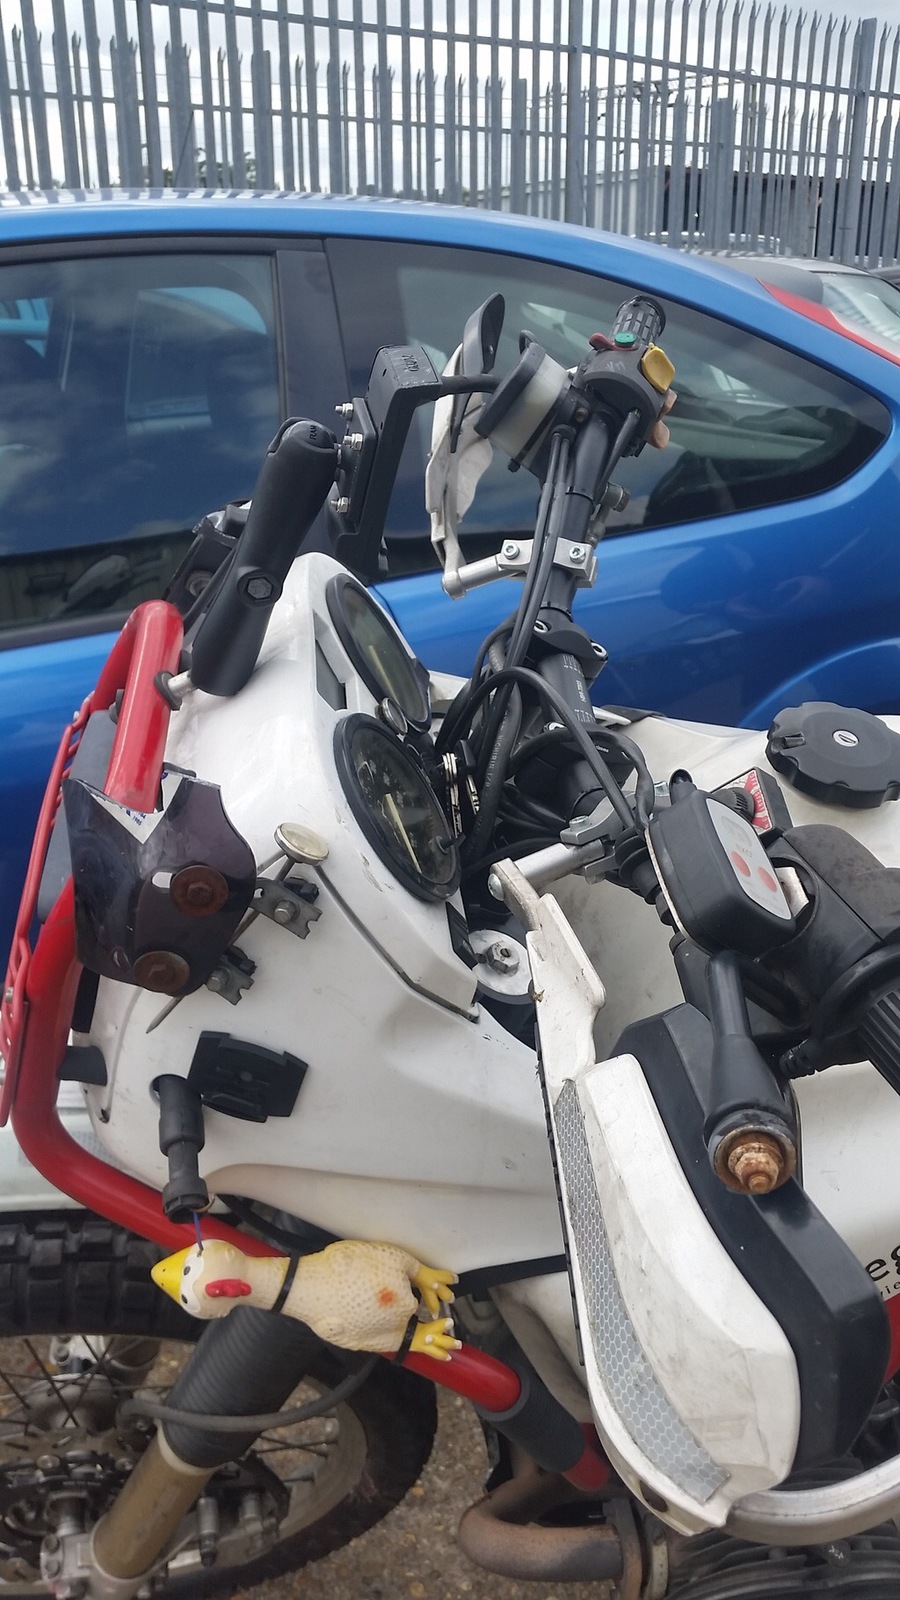
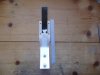
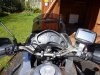
Maybe I'm being a bit fussy here, but does anyone else think that the RAM mount kit (for affixing yer Prat-Nav to yer bike) is a bit "mickey mouse"?

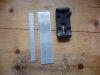
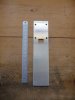
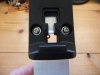
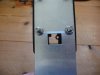
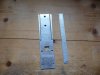
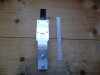
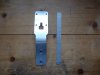
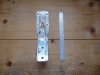
Yes, I know that they're catering for Metric and Imperial fasteners but, really do the mounting holes in the Handlebar Base have to be so HUGE? Sure clearance is needed for the 1/4" (6.25mm) screws but a hole that's 7mm one side and the hole opens out to damn near 9mm the other side?

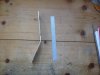
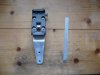
And plastic spacers? What's that all about? And the mounting screws - a 4mm hex key for an M6 fastening. I don't know about other bikes but Honda recommend a torque setting of 12lb/ft for the lever retaining clamp bolts, not massive I'll admit - but a 4mm hex!?

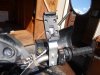
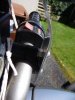
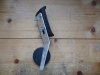
This Handlebar Base is meant to connect to either the Clutch or Brake lever mounting - so rather important that the levers don't fall off. I'm not impressed.

Yes, go ahead and tell me I'm worrying about nothing - it might calm me down a bit. ;)
 

Rubberchicken

Well-Known Member
RAM kit is usually sturdy enough, though the balls themselves are a bit poor. Do up the pratnav clamp well enough that it doesn't sag and they deform. Granted, when they've deformed your pratnav isn't sagging anymore on essentially a custom made clamp, but it's not moving anymore either if you'd want it to.

But yeah, sturdy enough. Mine was still there after I'd stuck it into a car at 30 mph.

IMG_4378.JPG
 

austin

Well-Known Member
I agree with Lutin - they are a bit crap and shonky. Equally though as per Rubber Chicken once installed and fastened up good and tight they don't go anywhere.
 

Rubberchicken

Well-Known Member
It's not the most elegant system in the world by any stretch. Bit agricultural and brutally practical, but that suits the GS... :)
 

Lutin

Administrator
Staff member
Forum Supporter
Now there's odd. Has anyone else noticed that the top of the Motorcycle Mount - the bit with the catch and release button - is magnetic. Not hugely, but definitely magnetic.

Baldrick Mode ON

I have a cunning plan. :D

Baldrick Mode OFF


Edit: But the plan does not involve magnets - at lest not yet. ;)
 

hotbulb

Active Member
Haven't noticed whether the bike mount has a magnet, but the car mount does..... i wonder if it's to tell the satnag what's being used.....on the 390 at least the fuel etc stuff only displays in bike mount, not in car, even though I haven't specifically changed the unit itself to the different mode.
 

boboneleg

Well-Known Member
Forum Supporter
I don't have a problem with Ram mount stuff, always worked well on all my bikes. Having said that, I don't like those mounts that utilise the brake/clutch mounts, I use others.
 

Lutin

Administrator
Staff member
Forum Supporter
Some progress on the cunning plan. I've decided to make myself a custom mount for the Garmin using the brake lever mounting point.

First off, find an odd piece of 40mm wide and 2mm thick aluminium strip in the shed. Shown with a 6" rule and the Garmin mount -


Next with a few holes cut in the right places -


Now with the mount, err, mounted and showing the rectangular hole nicely lining up with the depression in the mount for the power connector -


And finally from behind - as the bishop said to the actress........


That's it for today folks. Tomorrow I'll decide the height that it will be - and therefore where to drill the two 6mm mounting holes. More later.
 

Attachments

  • 1 - Start point.jpg
    1 - Start point.jpg
    141.6 KB · Views: 845
  • 2 - Some holes.jpg
    2 - Some holes.jpg
    123.3 KB · Views: 834
  • 3 - Power connector hole front.jpg
    3 - Power connector hole front.jpg
    91.7 KB · Views: 839
  • 4 - Power connector hole rear.jpg
    4 - Power connector hole rear.jpg
    81.4 KB · Views: 849

Lutin

Administrator
Staff member
Forum Supporter
austin said:
I am mighty impressed with your drilling prowess, especially with the square drill. :respect:

The age old trick of stitch drilling and some careful filing.

No square drills in my toolbox. ;)

Right, on with the show.....

Decided to slim down the aluminium strip by taking 5mm of each side -


It actually made a pretty good tuning fork at this stage. :D

So, after a bit of a tidy up of the cut edges I put a bend into the bracket. All done by time worn "she'll be right" technique.


Just whilst I was cogitating all this, I was wondering if the 2mm aluminium strip would not be sturdy enough and that there might be a bit of movement - especially with the weight of the Garmin on the end. So, when I put the bend in the bracket I did it with another 20mm strip of aluminium as bracing. Bending the two together means that I know they'll fit and not have to try and make it fit later - as would be difficult to get the separate bends to match.


Yes, I know that my strengthening strip covers up my lovely square hole. Still pondering that one. But there's plenty of overlap between the two pieces so cutting the narrower strip short should be fine.

And now onto how it looks on the bike....
 

Attachments

  • 5 - Slim down.jpg
    5 - Slim down.jpg
    138.2 KB · Views: 813
  • 6 - Put a bend in.jpg
    6 - Put a bend in.jpg
    121.5 KB · Views: 792
  • 7 - Extent of bend.jpg
    7 - Extent of bend.jpg
    112.4 KB · Views: 823
  • 8 - Just in case.jpg
    8 - Just in case.jpg
    108.3 KB · Views: 816
  • 9 - Strenghten.jpg
    9 - Strenghten.jpg
    117.7 KB · Views: 816

Lutin

Administrator
Staff member
Forum Supporter
There we go -


Detail of the spacers to get around the curved handlebar mount. The nuts are 6mm stainless items with the threads drilled out.


And here's the cockpit view -


Seems I might have got the bend in the bracket somewhere near right.

There's still a bit of tidying up to carry out - rounding off of corners, that sort of thing. But I think it's looking OK so far. Just need to decide whether or not to fit the strengthening strip straight off or see how it does without.
 

Attachments

  • 10 - On the Bike.jpg
    10 - On the Bike.jpg
    130.5 KB · Views: 763
  • 11 - Spacers.jpg
    11 - Spacers.jpg
    168.5 KB · Views: 744
  • 12  - Cockpit view.jpg
    12 - Cockpit view.jpg
    202.3 KB · Views: 753

Lutin

Administrator
Staff member
Forum Supporter
boboneleg said:
Nice,

what's the string for :D

To stop the brake lever, master cylinder and mirror falling off whilst I've been bolting and unbolting the clamp. :mockery17:

Anyway, more fettling. Decide to cut a slot to give the connector weather cap "lead" somewhere to go -


Now then, as to the electrics - I have a cunning plan for that too.......... ;)
 

Attachments

  • 13 - Cover slot.jpg
    13 - Cover slot.jpg
    128.4 KB · Views: 729

Philwhiskeydrinker

Well-Known Member
Nice work Lutin :)

Funny, always thought the various ram mounts have been decent but thinking back, yes the mix of metric & imperial fixings is a bit odd (re American) the handlebar clamps spin on the bar, tighten them & the supplied plastic packer splits so I guess they could be better....
Lately, I just mount a ball directly to the bar clamp & all is good in the world again :)

I notice you mount it on the rhs, won't this make making adjustments while on the move somewhat tricky? (not as if anyone would carry out such a thing...)
 

Lutin

Administrator
Staff member
Forum Supporter
Phil said:
Nice work Lutin :)

Funny, always thought the various ram mounts have been decent but thinking back, yes the mix of metric & imperial fixings is a bit odd (re American) the handlebar clamps spin on the bar, tighten them & the supplied plastic packer splits so I guess they could be better....
Lately, I just mount a ball directly to the bar clamp & all is good in the world again :)

I notice you mount it on the rhs, won't this make making adjustments while on the move somewhat tricky? (not as if anyone would carry out such a thing...)


Mounting on the right hand side - I'm right handed, didn't even think about mounting it on the left. How's that for conditioning? ;)
 

Lutin

Administrator
Staff member
Forum Supporter
After a failed attempt to have some bracing strips welded to the back of the bracket, all due to poor materials (B&Q), I've remade the bracket in 3mm aluminium.


Went round to a small firm here in Galway yesterday, called Radfix, that mend radiators and do other stuff like aluminium welding (and power coating too). The guys had a go at welding the bracket but it wasn't that successful and was given an offcut of 3mm alloy gratis to have another go at making a bracket.

So, here's the Mark 2 version -


This one shouldn't need any bracing.


Just need to get it painted today and get the whole lot installed.
 

Attachments

  • 17 - Mark 2.jpg
    17 - Mark 2.jpg
    139.8 KB · Views: 730
  • 18 - Fatter.jpg
    18 - Fatter.jpg
    127 KB · Views: 708
  • 16 - Welded.jpg
    16 - Welded.jpg
    128.1 KB · Views: 707

Lutin

Administrator
Staff member
Forum Supporter
Ian Porter said:
should this not be in Bodgers Corner?

:)

How dare you accuse me of bodging! I'll have you know I've just spent the last few minutes cutting down some 20mm M4 screws so that they're now 15mm long and will not have the extra length making the mount look untidy.

But yes, I 'spose you're right. Mind you, it did start off as a bit of a rant........ ;)
 
Top